
Understanding What Is a Stop Loss (And Why It's Your Best Friend)
Imagine you're driving down a steep mountain pass and your car’s automatic braking system suddenly engages, preventing a serious accident. That pre-set safety feature is a perfect analogy for what a stop loss is in the world of trading. It’s a simple yet powerful order you give your broker to automatically sell a security once it hits a certain price, acting as a crucial safety net for your capital.
The most important function of a stop loss is that it takes emotion out of the equation. This is a critical defence against two of the worst trading advisors: fear and hope.
The Psychology of Protection
When a trade starts to move against you, the natural human impulse is to hope it will turn around. This often leads to holding a losing position for far too long, transforming a small, manageable loss into a devastating one. A stop loss makes the selling decision for you before you find yourself in that stressful situation.
It’s a commitment to a disciplined strategy, one that helps you sleep better at night knowing your maximum potential loss on any single trade is already defined. This mental freedom is what often separates disciplined traders from emotional speculators.
How It Works in Practice
At its heart, a stop loss is a risk management tool designed to limit your potential downside. The idea is to decide on a price in advance at which a losing trade will be automatically closed. This caps your loss without you needing to watch the market every second.
For example, if you buy a stock at 100 ZAR per share and place a stop loss order at 90 ZAR, your broker will automatically sell your position if the price falls to that level. This prevents any further financial damage on that trade. This simple instruction is fundamental to preserving your trading capital over the long term and allows you to explore different strategies for placing your stop loss to better protect your investments.
The Inside Story: How Stop Loss Orders Actually Execute
Think of a stop loss order not as a single command, but as an automated security guard for your investment. When you place a stop loss, you’re setting a specific trigger point. Your broker’s computer systems then watch the market for you, monitoring real-time price feeds for countless positions at once. They are programmed to wait for one specific event: the moment your asset's price hits or drops below your stop price.
Once the market price reaches your predetermined level, the system springs into action. It instantly converts your stop loss instruction into a market order. This new order is then sent to the exchange to sell your asset at the best available price. This entire sequence, from the price trigger to the final sale, happens in milliseconds. The speed is crucial for protecting your capital from sudden market downturns without you needing to be glued to your screen.
The image below shows a clear red line on a price chart, visually representing where a stop loss is set.
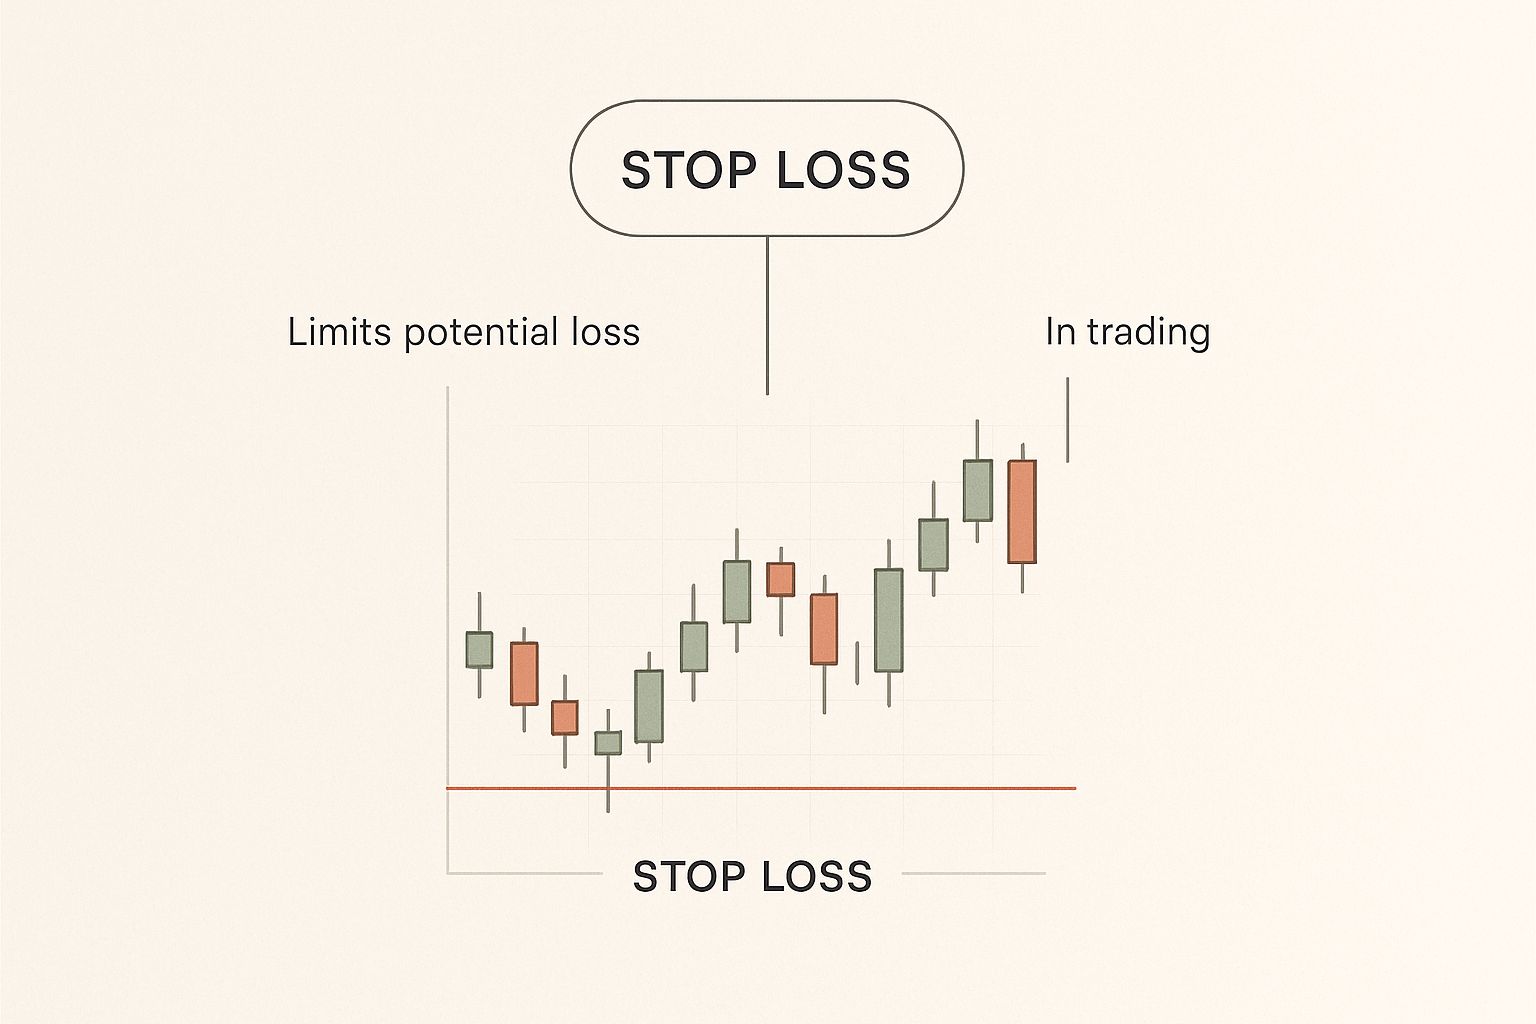
This visual shows the stop loss as a predefined exit point, taking the emotion out of the decision-making process when markets are falling.
From Trigger to Trade: The Key Steps
While the execution process is incredibly fast, it involves a few critical phases that decide the final price you get. Understanding these steps helps demystify what goes on behind the scenes after you set your order.
- Price Monitoring: Your broker’s systems are constantly fed live price data from the exchanges.
- Trigger Event: The market price of your asset touches or falls below your specified stop price.
- Order Conversion: Your stop instruction is automatically transformed into a live market order to sell.
- Execution: The exchange fills your sell order at the current market price. It's important to note this price could be different from your stop price, especially in fast-moving markets, due to a phenomenon called slippage.
Mastering Different Stop Loss Types For Every Situation
Just as a mechanic wouldn't use the same tool for every engine problem, a savvy trader needs to select the right type of stop loss for each market situation. Using the wrong one is like trying to fix a delicate watch with a sledgehammer—it can cause more harm than good. The standard stop loss order is your trusty, all-purpose spanner, but other specialised tools can offer better protection and flexibility. Understanding these variations is key to adapting your risk management strategy to different trading scenarios.
The Standard Stop vs. The Trailing Stop
The most common order is the standard stop loss, which sets a specific, fixed price for exiting a trade. For instance, if you buy a share at 100 ZAR and place a stop loss at 95 ZAR, the order will remain at 95 ZAR until it's triggered or you cancel it. This is straightforward and effective for trades where you have a clearly defined risk limit.
But what happens if the share price rallies to 150 ZAR? Your stop at 95 ZAR still protects your initial investment, but it does nothing to lock in any of your hard-earned profits. This is where a trailing stop loss truly proves its worth. It’s a dynamic order that automatically follows, or "trails," the market price by a predetermined percentage or rand amount.
For example, a 10% trailing stop on a share you bought at 100 ZAR would initially sit at 90 ZAR. If the price climbs to 120 ZAR, the stop automatically adjusts upward to 108 ZAR, securing an 8 ZAR profit per share. This clever tool lets your profits run while protecting your accumulated gains along the way.
The screenshot below shows how these different stop loss orders behave in a live trading environment.
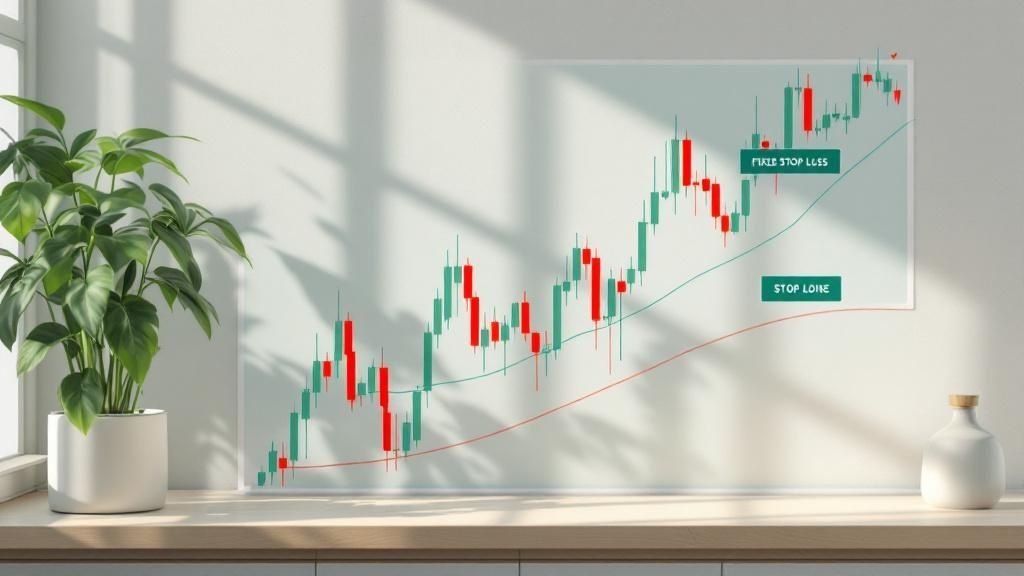
As the image highlights, while a standard stop is static, a trailing stop adjusts with the price, dynamically locking in profits as the trade moves in your favour.
Guaranteed Stops for Ultimate Protection
During periods of extreme market volatility, something called slippage can occur. This is when your standard stop loss order executes at a different, often worse, price than the one you specified. To combat this risk, many brokers offer a Guaranteed Stop Loss Order (GSLO). In exchange for a small premium, this type of order ensures your trade will be closed at your exact stop price, no matter how wild the market gets. Think of it as the ultimate insurance policy for your trade, particularly useful during major news events or for managing risk over a weekend.
The Strategic Art Of Stop Loss Placement
Deciding where to place your stop loss is arguably more important than simply deciding to use one. A poorly placed stop can get you kicked out of a trade on a minor, temporary dip in price — a frustrating experience known as being “stopped out” — only for you to watch the asset’s price reverse and move in the direction you predicted. On the flip side, a stop placed too far away defeats the purpose, exposing your capital to much larger losses than necessary. The real skill is in finding that sweet spot.

This process is a blend of technical analysis and a practical understanding of market behaviour. Instead of just picking a random percentage, experienced traders look for logical points on a price chart where the original reason for the trade would be proven wrong.
Finding Logical Placement Levels
One of the most popular and effective methods is to use support and resistance levels. Think of a support level as a price floor where an asset has historically attracted buyers, preventing it from dropping further. Placing your stop loss just beneath a significant support level is a logical move. This gives your trade room to fluctuate during normal market movement while signalling a real problem if the price breaks through that historical floor.
For instance, imagine you buy a stock at 110 ZAR and identify a strong support level at 105 ZAR. Placing your stop loss at 104 ZAR makes strategic sense. Your decision isn't based on an arbitrary figure but on the actual structure of the market.
Volatility-Adjusted Stops
Markets aren't static; they move in cycles of high and low volatility. A fixed stop loss that works perfectly in a calm market might be far too tight during a volatile period, getting you stopped out unnecessarily. This is where a volatility-adjusted stop proves its worth. Tools like the Average True Range (ATR) indicator can help you set stops that account for the market's current level of "noise."
- High Volatility: When prices are swinging dramatically, the ATR will be higher. This suggests you should use a wider stop loss to avoid being shaken out of your position by a sudden, large price swing.
- Low Volatility: In quieter markets, the ATR will be lower. This allows for a tighter stop, enabling you to protect your capital more closely without much risk of a premature exit.
By adapting your stop loss to current market conditions, you change it from a simple safety net into a more precise risk management tool. This is a key step towards building a more resilient and effective trading strategy.
Risk Management Secrets That Separate Winners From Losers
The critical difference between consistently profitable traders and those who lose their capital often isn't a secret market-predicting formula; it's disciplined risk management. Understanding what a stop loss is represents the first step, but mastering how to integrate it into a broader strategy is what truly separates professionals from amateurs. Successful traders realise that long-term wealth isn't built on a few massive wins but on the careful preservation of capital. They focus more on how much they could lose than on how much they could win.
This seemingly counterintuitive focus on defence is the bedrock of their success. By risking only a small, manageable portion of their total capital on any single trade, they ensure no single loss can ever knock them out of the game. They can be wrong multiple times and still remain profitable over the long run. This systematic approach transforms trading from a gamble into a calculated business.
Sizing Your Position Correctly
Position sizing is how you put your risk management rules into action. A popular guideline followed by many retail investors in South Africa is the ‘2% rule’. This principle states that a trader should risk no more than 2% of their total trading capital on a single trade.
For example, with a ZAR 50,000 account, the maximum acceptable loss per trade would be ZAR 1,000. This figure then determines where the stop loss must be placed relative to the number of shares purchased. You can learn more about how South African traders apply this rule to inform their strategies. A strict, rule-based approach removes emotion and ensures that even a string of losses won’t catastrophically damage your portfolio.
To illustrate how this works in practice, the table below shows how the 2% rule applies to different account sizes.
Risk Management Strategies by Trading Capital
Practical examples of position sizing and stop loss placement based on different account sizes using the 2% rule
| Account Size (ZAR) | Maximum Risk (2%) | Example Stop Loss | Position Size |
|---|---|---|---|
| ZAR 10,000 | ZAR 200 | R2.00 per share | 100 shares |
| ZAR 50,000 | ZAR 1,000 | R5.00 per share | 200 shares |
| ZAR 100,000 | ZAR 2,000 | R10.00 per share | 200 shares |
| ZAR 250,000 | ZAR 5,000 | R10.00 per share | 500 shares |
This table shows that as your capital grows, the absolute rand amount you can risk increases, but it always remains at that disciplined 2% level. This consistent application is what allows small, steady gains to compound into significant wealth, proving that effective risk management is the ultimate secret to winning.
Avoiding The Stop Loss Traps That Destroy Accounts
Even with a solid grasp of what a stop loss is, many traders still stumble into predictable traps that can devastate their accounts. These aren't usually complex strategic blunders, but simple mistakes in judgement and discipline that are repeated across all markets. Recognising these common pitfalls is the first and most important step toward protecting your hard-earned capital.
The most frequent mistakes often boil down to where the stop loss is placed. Setting a stop too close to your entry price, for instance, is a perfect recipe for getting kicked out of a trade by normal market noise. This leads to a slow and painful "death by a thousand cuts," where small, avoidable losses steadily eat away at your account balance.
The Psychological Battle
On the other hand, placing your stop too far away is an equally critical error. This flips a risk management tool on its head, turning it into a permission slip to take on massive, unnecessary losses. This often happens when a trade starts moving against a trader. Instead of accepting a small, planned loss, they move their stop further down, hoping the market will turn around. This is a psychological battle where discipline, not hope, is the only winner.
Understanding Stop Hunting
Finally, there's a more nuanced trap known as ‘stop hunting’. This is a much-debated idea that large institutional players or their algorithms deliberately push prices toward an area where they know many retail stop loss orders are clustered.
To protect yourself from this, whether it's real or perceived:
- Place stops at logical levels based on the market's structure (like below a recent swing low), not just at obvious, round numbers like R150.00.
- Use volatility indicators to help you give your trades enough breathing room to move without hitting your stop prematurely.
- Never move a stop further away from your entry price once the trade is active. This is a golden rule.
By being aware of these traps, you can begin to build a more resilient and psychologically sound approach to placing your stop loss orders.
Your Complete Stop Loss Implementation Action Plan
Knowing what a stop loss is and putting that knowledge into practice are two different things. This action plan is designed to bridge that gap, turning theory into a real-world system you can use to protect your trades. Think of it as building a consistent process that suits your trading style and, most importantly, protects your capital.
The first step is to formalise your rules for managing risk. Don't leave critical decisions to the heat of the moment. Create a personal trading plan that clearly states the maximum you're willing to risk on any single trade. Many traders in South Africa follow the 2% rule, meaning they won't risk more than 2% of their total account balance on one position. Your plan should also specify which technical indicators you'll use to decide where to place your stop.
Your Initial Setup Checklist
To get started with stop loss orders, follow these fundamental steps:
- Define Your Strategy: Are you a long-term investor holding positions for months or a short-term trader in and out of the market within days? Your timeframe is a major factor in determining where to place your stops.
- Select Your Stop Type: A standard stop loss placed just below a key support level is often a solid choice for most trades. If you believe a trade has room to run, a trailing stop can be a great tool to lock in profits as the price moves in your favour.
- Calculate Position Size: Before you even think about clicking "buy," use your chosen stop loss level to figure out the correct position size. This ensures that if the trade goes against you, your loss will align with your non-negotiable 2% risk rule.
- Backtest Your Approach: Look at historical charts and see how your stop loss strategy would have played out on past trades. This process builds confidence in your method and helps you spot any potential weaknesses before you risk real money.
Tracking and Adapting for Success
Managing risk effectively isn't a "set and forget" task. Keeping a detailed trading journal is crucial for long-term success. For every trade, you should record your entry price, your stop loss level, why you placed it there, and what the final outcome was.
Over time, this data will show you patterns in your own trading behaviour. You might find you're consistently setting your stops too close to your entry, or that certain market conditions call for a wider, more forgiving stop. This cycle of review and adjustment is what separates amateurs from professionals, helping your stop loss strategy evolve with the market and your own growing experience.
Ready to manage your business's international payments with the same level of control and transparency? Learn how Zaro can help your South African business eliminate hidden fees and simplify global transactions.